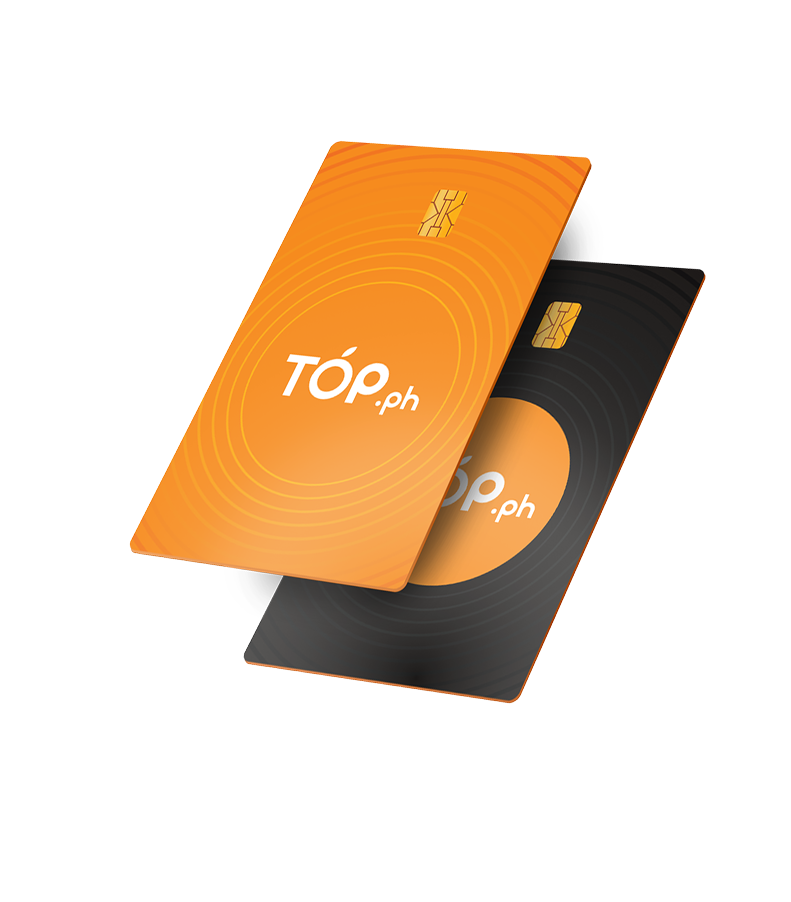
Pay & Slay
Works as a payment tool, making your transactions smoother and more convenient.
Convenient Cash Withdrawals
Easily access cash from ATMs nationwide with the TOP Card.
Accessible Anywhere
Available for use across the country, ensuring you can get cash no matter your location.
Enhanced Financial Freedom
Provides the ease of having cash on hand without the hassle of transactions breaking down due to slow internet.



Request a TOP Card
Request
a TOP Card
Log in to your TOP.ph app.
Tap TOP Card icon on wallet screen.
Tap Request TOP Card.
Select a card design (Classic Orange and Slick Black) then tap Next
Review your card name then tap Shipping
Select an address or add new address then tap Payment
Confirm your payment then tap Pay.
Verify your request via biometrics. Wait for the transaction to be completed.
Tap View Details on the receipt. You may check your card request details!
Wait for 2 to 3 business days to deliver your card.
Get Started with your TOP Card
Get started with
your TOP Card.
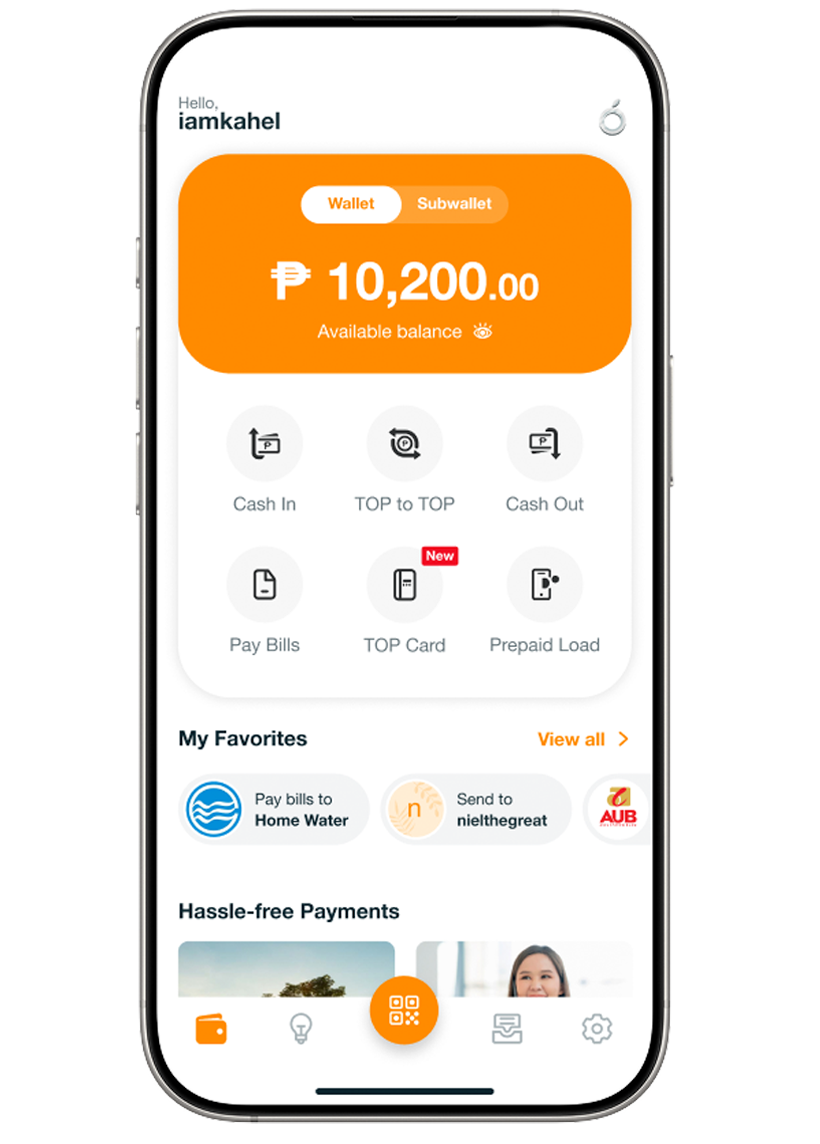
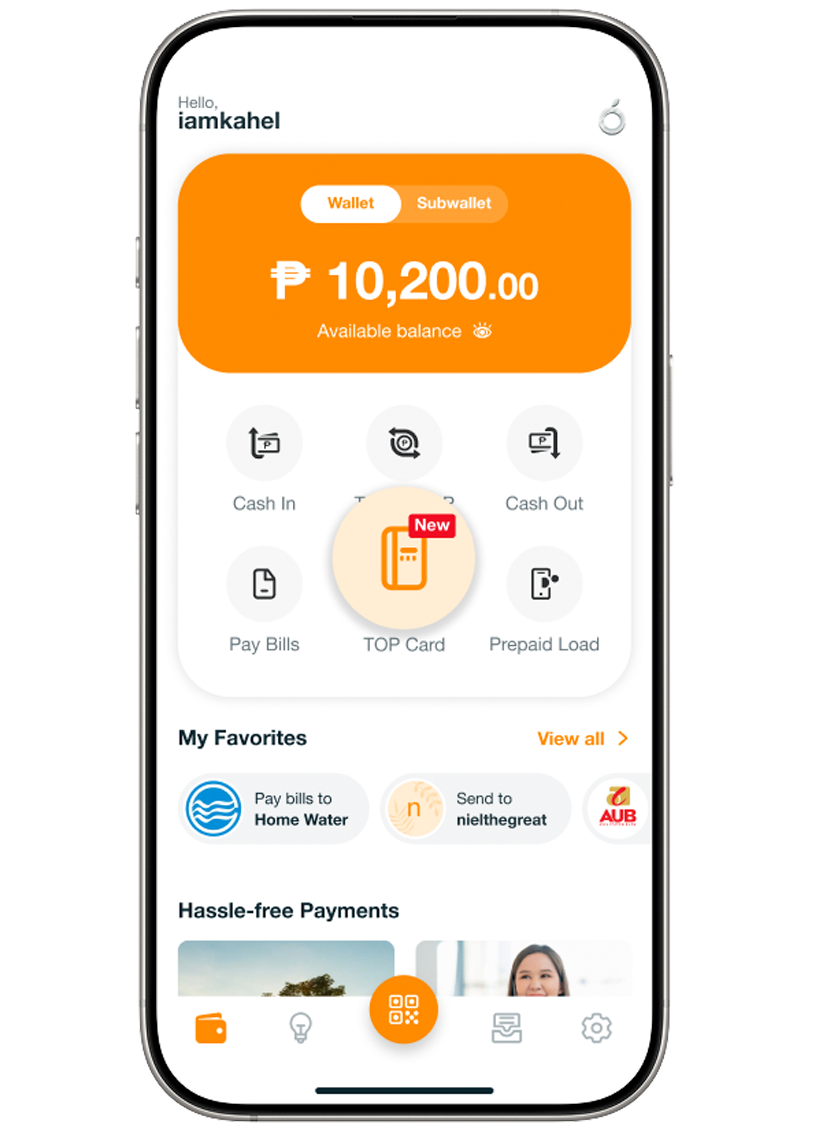
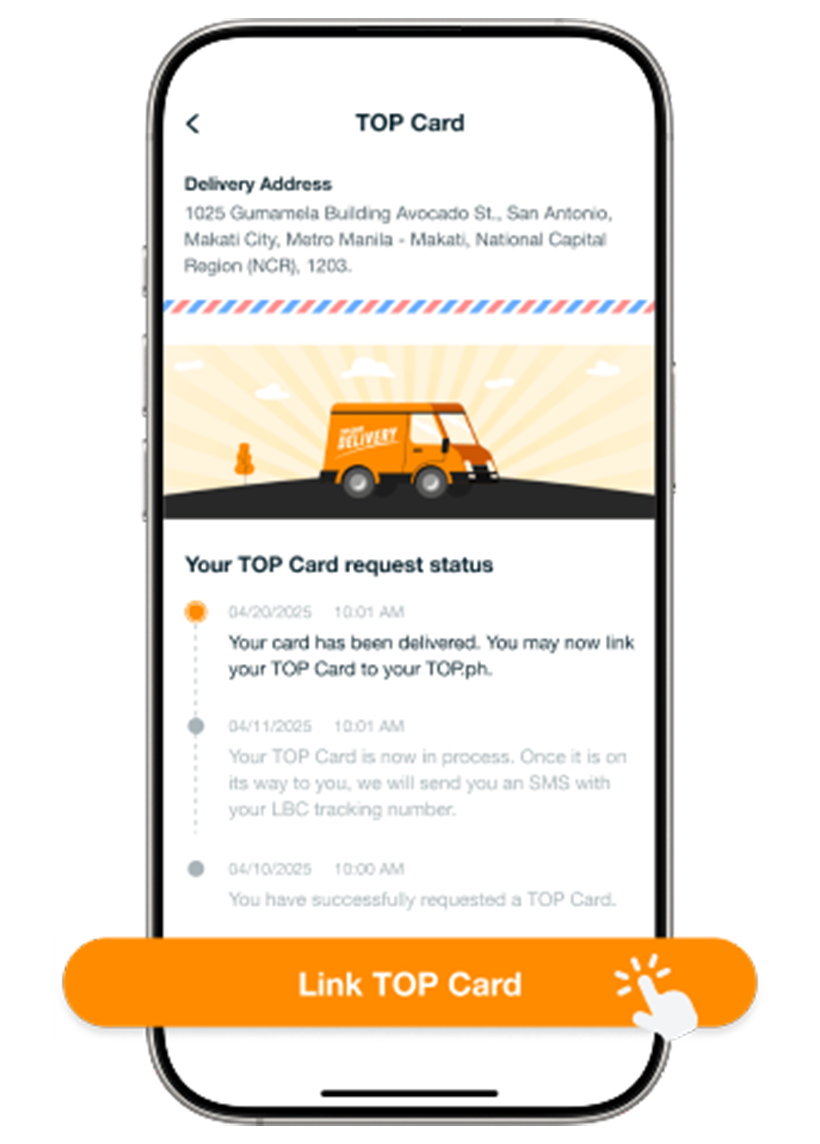
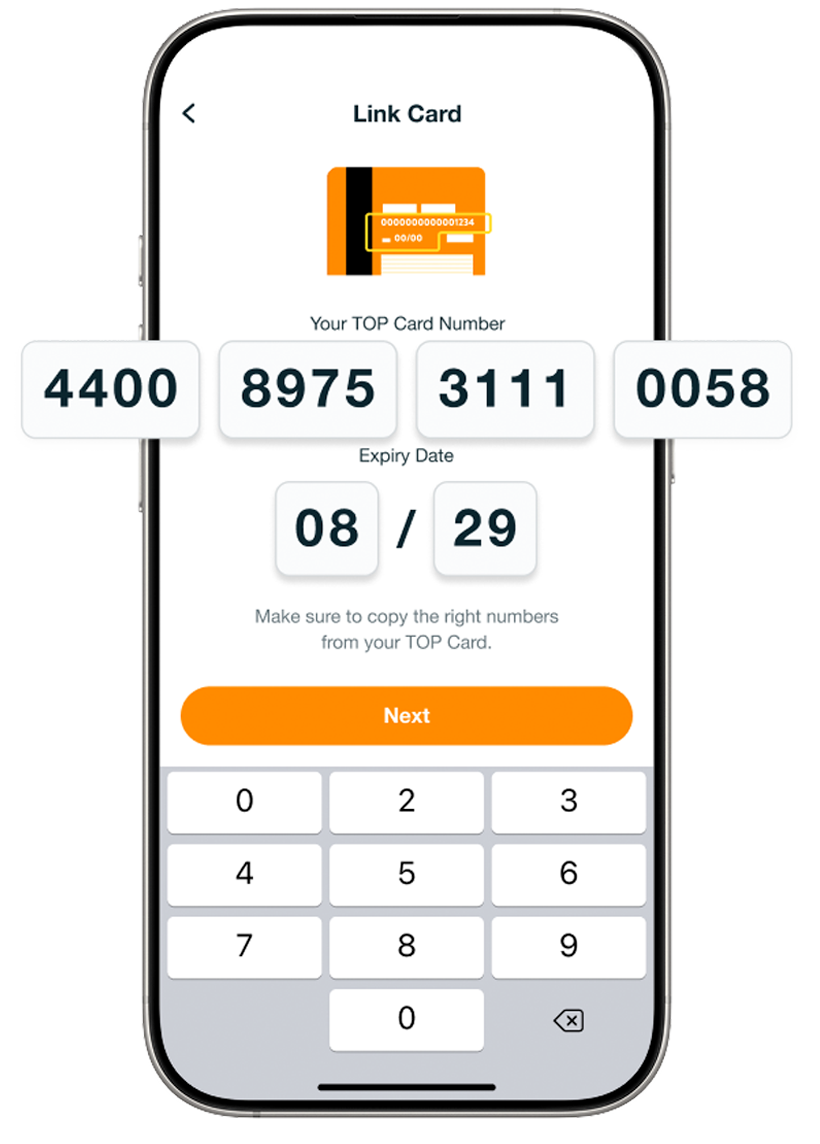
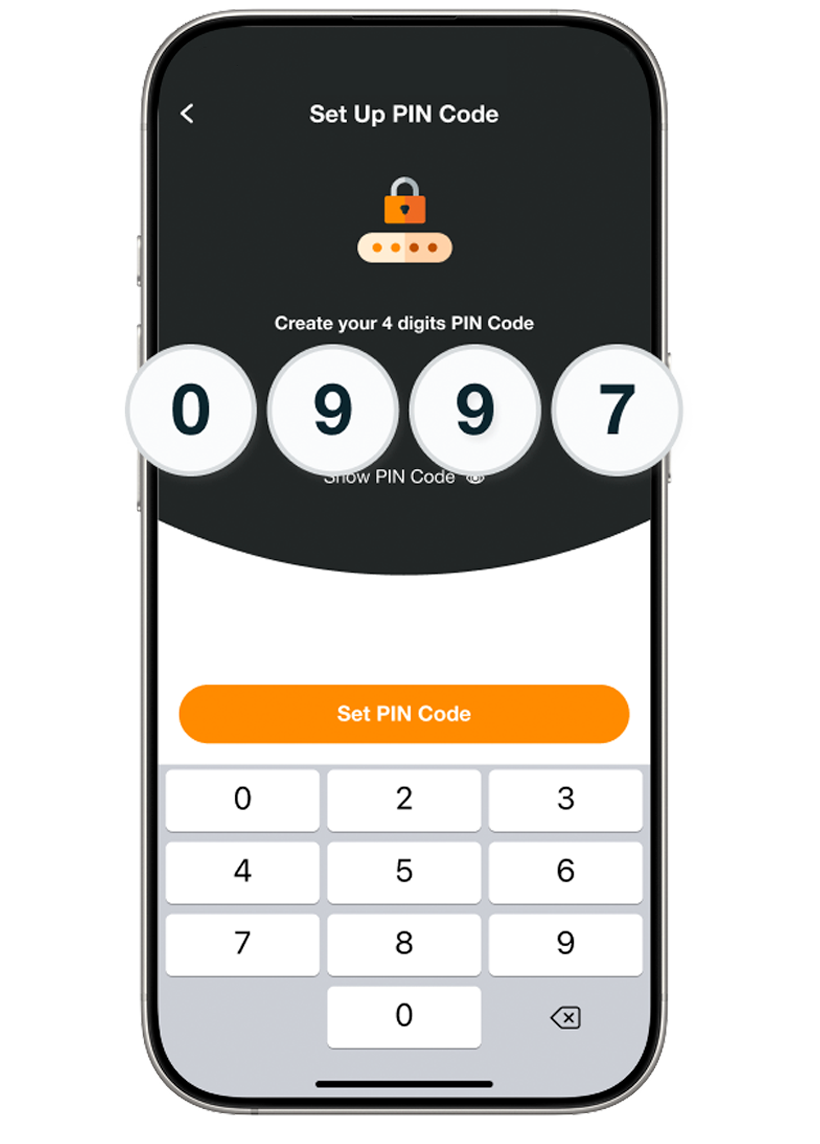
Get started with your TOP Card.


Get started with Top Card
Click and see guide


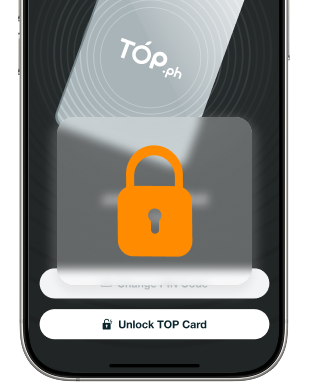
Protect your TOP Card
Protect
your TOP Card
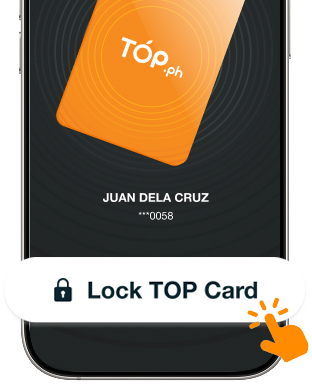
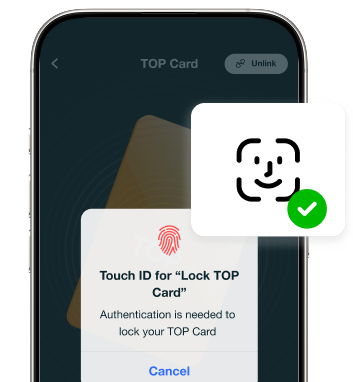
Frequently Asked Questions
Still need answers? Call us.
The Orange Platform (TOP.ph) is our response to the current demand to go cashless in today’s digital age. TOP.ph is an app that will soon cater to all your financial needs. For users, it is an electronic wallet that provides both ease and protection, serving the unbanked population and bridging the gap in financial literacy.
For businesses, TOP.ph provides a convenient, secure, and cost-effective payment solution that enhances customer experience, expands market reach, and improves cash flow management.
The basic-level wallet’s monthly inward/outward limit is Php200,000. Once it reaches this limit, it will reset on the first day of the following month.
Note: If you have a fund disbursement in your sub-wallet amounting to more than P200,000, you can only transfer based on your remaining monthly limit.
To learn how to view your Wallet Level Details, click here https://top.ph/how-to-view-your-wallet-level-details/
To download TOP.ph on your Huawei phone, follow these steps:
Step 1: Open the AppGallery.
Step 2: Tap the search bar at the top of the screen, type “TOP.ph,” and tap “Enter..”
Step 3: From the search results, find TOP.ph app and tap “Install.”
Step 4: After installing, you can open the app and create an account.
Here are the steps to complete your TOP to TOP (Send Cash) via QR Code.
Step 1: On the home screen, tap Pay Bills.
Step 2: Tap the QR button on your navigation bar. Then, place the recipient’s QR code.
Note: You cannot add the receiver to your favorites
Step 3: Fill in the amount and select the purpose (the purpose is optional; you can skip this part), then tap “Proceed.”
Step 4: Confirm details, tick the box, and tap “Pay.”
Note: Please ensure all details are correct before proceeding with your transaction. Once submitted, the transaction cannot be reversed or refunded.
Step 5: The “Transaction Complete!” screen will appear.
Note: To download the receipt, tap “Download Receipt” at the bottom of the screen.
Step 6: You will receive an SMS and email regarding the status of your transaction. You can also view your activity in the app’s Transaction History.
To learn how to get to the Transaction History, click here: https://top.ph/how-can-i-access-my-transaction-history/
Here are the steps to complete your TOP to TOP (Send Cash) via Phonebook.
Step 1: Log in to your TOP.ph app.
Step 2: From the homepage, tap “TOP to TOP.”
Step 3. Tap the Phonebook icon on the right side of your screen.
Step 4. Tap “Phone Book.”
Note: Allow TOP.ph to access your Phonebook. If the permissions pop-up does not appear, you can turn this on in your phone settings.
Step 5. Choose the receiver’s name from your Phonebook.
Note: Enter the receiver’s name in the search box, then tap “Search.”
Step 6. Choose the number of the receiver in the search results and tap “Select.”
If you wish to add the receiver to your favorites, tap the star icon on the right side of the mobile number field.
Step 7. Enter the amount you want to send, select the transaction’s purpose from the dropdown menu, and tap “Proceed.”
Step 8. The “Confirm Details” screen will allow you to double-check the filled-in details. If there are incorrect details, tap the arrow back button on the top left of the screen to edit the wrong information. Once confirmed, tap “Send.”
Note: Ensure all details are correct before proceeding with your transaction. Once submitted, the transaction cannot be reversed or refunded.
Step 9. The “Transaction Complete!” screen will appear. Tap “Download Receipt” at the bottom of the screen if you want a copy of your transaction.
TOP Card Terms and Conditions
Welcome to TOP.ph. Before you submit a request for the TOP Card, please review these Terms and
Conditions (the “T&C”). This T&C governs your access to and use of the TOP Card, as well as any
associated services. By requesting or using the TOP Card, you acknowledge that you agree to comply
with this T&C, TOP.ph General Terms and Conditions, and Privacy Notice.
This T&C will become effective when you request the TOP Card and will remain in effect until either you or we terminate it. However, certain provisions will continue to apply even after termination, as required by law, regulation, or due to the nature of their operation.
TOP.ph reserves the right to update this T&C at any time. If there is a significant change to the terms,
THE ORANGE PLATFORM CARD TERMS AND CONDITIONS
Welcome to TOP.ph. Before you submit a request for the TOP Card, please review these Terms and Conditions (the “T&C”). This T&C governs your access to and use of the TOP Card, as well as any associated services. By requesting or using the TOP Card, you acknowledge that you agree to comply with this T&C, TOP.ph General Terms and Conditions, and Privacy Notice.
This T&C will become effective when you request the TOP Card and will remain in effect until either you or we terminate it. However, certain provisions will continue to apply even after termination, as required by law, regulation, or due to the nature of their operation.
TOP.ph reserves the right to update this T&C at any time. If there is a significant change to the terms, we will notify you at least sixty (60) days before the changes take effect. A change is considered significant if it notably impacts how you use the TOP.ph app or if required by legal or regulatory updates. By continuing to access or use the TOP.ph App after receiving notice of these changes, you indicate your acceptance of the revised Terms.
In this T&C, the terms “TOP.ph,” “TOCI,” “we,” “us,” and “our” refer to The Orange Company Inc. (TOCI), including its directors, officers, employees, representatives, partners, service providers, affiliates, successors, and assigns. “User,” “you,” and “your” refer to the individual requesting or using the TOP Card.
The Orange Company Inc. (TOCI) is regulated by the Bangko Sentral ng Pilipinas (BSP).
Definitions. The following definitions are used on TOP.ph:
“Account” shall mean an active TOP.ph account created upon approval and registration of the Account Holder as User under TOP.ph.
“Account Holder or User” shall mean the person who maintains the TOP.ph account and in whose name the Account is registered.
“Cardholder” shall mean the Account Holder who has been issued a Card linked to his Account.
“PIN” shall mean personal identification number, a personalized digit code used to initiate and/or authorize Account transactions, whether nominated by the Cardholder or generated by the system of TOCI or such other similar authentication process generating such code. For clarity, the term shall also include one-time passwords (OTPs).
“TOCI” shall mean The Orange Company Inc., the proprietor of TOP.ph.
“TOP Card” shall mean the prepaid debit card physically issued by TOP.ph linked to a TOP Wallet, which can be used for Point-Of-Sale (POS) purchases or payments, and Automated Teller Machine (ATM) cash withdrawals.
"TOP.ph" is an electronic wallet application where users can send and receive money seamlessly using mobile phones. Users of TOP.ph can also pay bills, buy prepaid loads, and purchase different products available in the mobile application.
“TOP.ph Website” is used to officially represent TOP.ph on the internet, where visitors may register to create an account. Users are also provided with information about products and services.
“TOP Wallet” refers to an electronic money instrument that stores Philippine Peso value which resides in TOP.ph system. It is an account that is created for purposes of availing of TOP Disbursement Portal.
User Eligibility. All Users with fully-verified Account are qualified to apply for a TOP Card, subject to this Agreement, as may be modified from time to time.
Any person without a legal impediment may apply for a TOP Card. Any TOP Card issued to the User is non-transferable. TOP.ph may suspend or deactivate the TOP Card for reasons specified under this Agreement and the Terms and Conditions for TOP.ph. The User agrees to surrender the TOP Card upon demand by TOP.ph. In the event of any suspension or deactivation of the TOP Card, the User agrees to hold TOP.ph free and harmless from any claims arising from such suspension, deactivation, or confiscation, unless the claims are proven to be directly and solely due to TOCI’s gross negligence.
TOP.ph has the prerogative to approve or reject TOP Card feature whenever it deems appropriate and necessary. If request for TOP Card has been rejected, User can apply for another request.
In the event of any unauthorized use of the TOP Card, TOCI shall not be liable for any inconvenience or damage caused to the User, unless the unauthorized use of the TOP Card is proven to be directly and solely due to TOCI’s gross negligence.
TOP Card Usage. The TOP Card is an optional feature that should be linked to the Account to provide the Account Holder with additional payment methods. The TOP Card allows the Cardholder to conduct POS purchases or payments and ATM cash withdrawals. For clarity, the Account may only be linked to one (1) TOP Card. The TOP Card is exclusively for the use of the Cardholder and is non-transferable.
If an Account Holder requests for a TOP Card, TOCI will arrange delivery. However, after three (3) failed attempts of deliver, the TOP Card shall be returned to TOCI and Account Holder shall coordinate with TOCI Customer Support. If the delivery address is within Metro Manila, recipient may pick-up his TOP Card in TOCI’s head office.
The Account Holder may obtain the TOP Card from TOP.ph or other channels as determined by TOCI at its discretion. The Cardholder acknowledges that the TOP Card is the property of TOCI, and TOCI reserves the right, at any time, to terminate the use of, cancel, repossess, or refuse to issue, renew, or replace the Card, without prior notice to the Cardholder or the necessity of providing a reason for such actions.
By using the TOP Card, the User agrees to the provisions of this T&C and the terms and conditions of Asia United Bank (AUB).
Card Linking. The Account Holder shall bear sole responsibility for the security of the TOP Card when used in connection with withdrawals and purchases. The Account Holder acknowledges and agrees that TOCI shall not be responsible for determining or evaluating the legitimacy or authenticity of any transaction involving the TOP Card.
Once the Account Holder has linked his TOP Card to his Account, TOP.ph will store in its system all information related to the TOP Card, including but not limited to transaction details.
TOP Card Security. The User shall keep his TOP Card number, PIN, and other related credentials confidential and secure at all times. These must not be disclosed to anyone. You are responsible for ensuring the security of your TOP Card and PIN. Any transactions made using your TOP Card shall be conclusively presumed to have been made by you, and you shall be liable therefor.
You agree to assume full responsibility and liability for all transactions made in your TOP Card. You acknowledge and agree that your PIN is known only to you and that any transaction using your PIN shall conclusively be presumed to be done by you.
You agree that TOP.ph, at its sole discretion, is entitled to act on instructions received from you through the TOP.ph upon entry of your PIN. You shall hold TOP.ph free and harmless from any claims arising from the use of your PIN, unless such claims result from the gross negligence of TOP.ph.
The security, safekeeping, and proper use of your TOP Card, as well as the confidentiality of your PIN, shall be your sole responsibility.
Account Limits. The TOP Card does not require a minimum balance to be maintained. Only one (1) TOP Card can be linked to a User’s Account. Users are permitted to make two withdrawals per day, regardless of whether or not cash is withdrawn. The maximum amount that can be withdrawn per transaction is Ten Thousand Pesos (Php10,000.00). If a User attempts a third withdrawal on the same day, the TOP Card will be locked.
Users may withdraw up to Fifty Thousand Pesos (Php50,000.00) per day. To access the full daily withdrawal limit, the User must unlock their TOP Card via the TOP.ph to enable withdrawals beyond the two-per-day limit.
Funding the Account. Additional funds may be added through the available methods provided by TOP.ph.
The Account's funding will be deemed successful only after TOCI has verified it, which may occur on a date that is distinct from the original date of deposit. The amount verified by TOCI shall be definitively considered the true amount that was actually credited to the Account. Any transaction receipt issued at the time of funding the Account shall be considered solely as evidence that an amount was intended to be deposited into the Account. However, TOCI shall not be bound by the receipt until TOCI has verified its accuracy and correctness.
Transactions. By using the Account and/or the TOP Card to accept transactions, the Account Holder acknowledges and agrees that TOCI solely acts as an intermediary between the Account Holder and the payee. TOCI shall not be liable for any disputes, claims, or liabilities that may arise between the Account Holder and the payee, or any other third party. The Account Holder agrees to indemnify and hold TOCI harmless from any such claims, liabilities, or actions.
The Account Holder accepts full responsibility for all transactions made through TOP.ph and/or the TOP Card, regardless of whether these transactions were conducted without their knowledge, authorization, signature, password, or PIN. All transactions conducted via TOP.ph and/or the TOP Card will be considered by TOCI as authorized by the Account Holder and will be binding and valid. In the absence of a clear and evident error that is promptly reported to TOCI in writing, the transaction records maintained by TOCI shall be deemed final and conclusive for all purposes. The Account Holder further agrees to waive any rights or remedies against TOCI in relation to such transactions.
The Account is not considered a deposit account. It is redeemable only at its face value and does not accrue interest, rewards, or similar incentives that can be converted to currency. The Account cannot be purchased at a discounted price.
Furthermore, the Cardholder agrees not to use the TOP Card to purchase items or goods whose importation into the Philippines is either prohibited or regulated. Furthermore, the TOP Card may only be used for lawful transactions or charges. Under no circumstances should the TOP Card be used for gambling, games of chance, or for transactions whose purpose, object, or intent is contrary to law, public morals, public order, or public policy (collectively referred to as “Prohibited Transactions”). TOCI reserves the right to revoke or cancel the TOP Card and/or any associated privileges if it determines the TOP Card is being used for Prohibited Transactions. Additionally, if TOCI identifies that the TOP Card is or has been used in connection with Prohibited Transactions or for transmitting or receiving proceeds from such transactions, TOCI may take appropriate legal action, including returning the proceeds to the original sender. Any transactions involving Prohibited Transactions will be immediately declined.
The Account Holder acknowledges and agrees that the transactions of the TOP Card are processed through Bancnet. These transactions will have a debit effect on the Account to which the TOP Card is being linked to for the amount authorized including applicable taxes and charges, if there are any.
Transaction History and Statement of Account. The Account Holder acknowledges that his Transaction History and Statement of Account are available and provided for viewing in TOP.ph. Accordingly, the Account Holder’s Transaction History can be filtered according to the Account Holder’s period of preference. TOCI shall not be held liable from any claims should the statement be received and read by a person other than the Account Holder. Neither may the Account Holder raise the defense that he failed to receive the Statement of Account, In all instances, the Account Holder may require about the Statement of Account by contacting the TOCI Customer Support. TOCI will not charge a fee for Statement of Account requests.
Responsibilities of the Account Holder. To help ensure the security of transactions conducted through or otherwise involving the Account, the TOP Card, and/or TOP.ph, as well as the protection of the Account Holder’s personal information that may be stored in TOP.ph, the Account Holder agrees to strictly adhere to the following security measures, in addition to any other security protocols that may be recommended or implemented by TOCI:
- Upon successful linkage of the TOP Card to the Account, promptly set a unique PIN;
- Avoid using the Account Holder’s birthday or the birthday of any person associated with the Account Holder as the PIN;
- Maintain the confidentiality of the TOP Card number, PIN (including system-generated and/or one-time passwords), TOP.ph password, and any other security features introduced by TOCI, and refrain from disclosing these details to anyone;
- Refrain from engaging in any activities that could compromise the security of the Account Holder’s personal information;
- Exercise caution when using the Device, the TOP Card, and/or TOP.ph;
- Avoid conducting transactions on TOP.ph in public spaces;
- Retain a copy of the transaction reference number provided by TOCI for every transaction performed, as proof that the specific transaction was executed.
Additionally, the Account Holder shall ensure the security of their Device, refraining from lending it to others or exposing it to conditions that may allow unauthorized access.
Limited Liability of TOCI. In addition to the indemnity and non-liability provisions set forth in this T&C, the Account Holder agrees to indemnify, defend, and hold harmless TOCI, including its directors, officers, employees, agents, and assigns, from and against any claim, cause of action, suit, liability, loss, or damage of any kind or nature arising from or in connection with the use of the Account, the TOP Card, and/or TOP.ph, and the transactions processed through the Account, the TOP Card, and/or TOP.ph in the following situations:
- Refusal of a POS Terminal and/or ATM to allow, accept, or honor the TOP Card;
- Any unauthorized transactions;
- Theft, or unauthorized use of the Account, the TOP Card, and/or TOP.ph by the Account Holder to the third party;
- Any misrepresentation, fraud, or misconduct by any third party;
- Disruption, failure, or delay in the use of the Account, the TOP Card, and/or TOP.ph due to circumstances beyond TOCI's control or due to force majeure events including, but not limited to, prolonged power outages, computer and communication breakdowns, network errors, natural disasters such as typhoons and floods, public disturbances, and similar occurrences;
- Fraudulent or unauthorized use of the Account, the TOP Card, and/or TOP.ph resulting from theft, unauthorized disclosure, or security breaches involving the TOP Card number, PIN, TOP.ph password, and/or Account number, with or without the Account Holder’s involvement;
- Inaccurate, incomplete, or delayed information received by TOCI due to disruptions or failures in communication facilities, networks, or electronic devices used for TOP.ph and/or the TOP Card;
- Mechanical defects or malfunctions of the Device;
- The TOP Card and/or the payment methods available through TOP.ph being declined or not honored;
- Delays in loading funds to the Account due to failures or malfunctions of any mechanical, electronic, or other system or network critical to the operations of the relevant branch or payment gateway; and/or
- Improper, unauthorized, or reckless use of TOP.ph, the TOP Card, or the Device, or accidents occurring in connection with their use.
This provision shall survive the termination or suspension of the right to use the TOP Card and/or TOP.ph, as well as the closure or suspension of the Account.
Loss or Theft TOP Card. In the event that the TOP Card is lost or stolen, the Account Holder must immediately lock the TOP Card through TOP.ph and immediately the incident to TOCI Customer Support and request the blocking of the account within twenty-four (24) hours from the discovery of loss or theft. The Cardholder is required to submit an affidavit of loss, in a form and substance acceptable to TOCI, as well as any additional documentation reasonably requested by TOCI in accordance with prevailing policies and procedures.
The Account Holder agrees that TOCI shall suspend the use of, or access to the TOP Card until necessary measures have been taken to ensure their secure use.
The Account Holder understands and agrees that until TOCI receives notice from the Account Holder regarding any such loss, theft, or compromise, all transactions conducted through the TOP Card shall be conclusively deemed valid and binding on the Account Holder. TOCI shall not be held liable for any loss or damage incurred by the Account Holder in relation to such transactions.
Notices. All notices and communications in relation to these Terms and Conditions shall be in writing and shall be sent to Account Holder at the contact information provided in TOP.ph registration process. It shall be the Account Holder’s responsibility to notify TOCI of any change in the contact information. Until TOCI is notified of such change, TOCI shall be entitled to use the information in its records.
Fees and Charges. The Account Holder hereby grants TOCI the authority to debit the Account for the amount of the posted fees and charges without the necessity of any additional notice, demand, authorization, or action. TOCI may suspend or terminate the use of the Account and, as a consequence, the TOP Card, if there are insufficient funds in the aforementioned account to cover fees and charges at any moment, without incurring any liability. The Account Holder shall be responsible for any and all taxes that result from the payment of fees and charges as outlined in this document. The Fees & Charges table will be incorporated into the T&C, which TOCI may update from time to time in writing and promulgate in the manner that TOCI deems appropriate.
TOP Card Termination or Suspension or Deactivation. The Cardholder has the option to suspend or terminate the TOP Card's use by contacting TOCI Customer Support. To the best of TOCI's ability, the requested cancellation or termination will be implemented immediately. Until the termination or suspension of the Card's use, the Cardholder is accountable for any transactions that are conducted or completed through the Card.
TOCI may terminate or suspend or deactivate the TOP Card at any time without need of prior notice to the Account Holder in the event that:
- TOCI determines that the Account Holder shall have breached this T&C;
- TOCI determines that the Account, TOP.ph, and/or TOP Card is being used by an unauthorized person, for fraudulent or suspicious transactions, or for unlawful activities;
- TOCI determines that any of the information and/or documents provided by the Account Holder during TOP.ph registration process is false, fictitious, forged or misleading;
- TOCI learns of the Account Holder’s bankruptcy, insolvency, liquidation, dissolution, death, incapacity, or other analogous circumstances, or that the Account Holder committed an act of bankruptcy, insolvency, liquidation, dissolution or other analogous acts, or that a bankruptcy or insolvency or other analogous petition has been filed against the Account Holder;
- In the reasonable determination of TOCI, the Account, the TOP Card and/or TOP.ph is/are being used for any unlawful, illegal or prohibited activity or transaction;
- In case of closure, termination, suspension, or restriction on the Account; or
- TOCI considers that there exists other reasonable grounds to do so.
The Account Holder's accrued but unpaid obligations to TOCI prior to termination, as well as the terms and conditions of this agreement, which are expressly stated to survive the termination of the Account Holder's right to use the Account.
The TOP Card may be temporarily suspended or blocked permanently by TOP.ph and AUB if certain anti-fraud measures are triggered. TOP Card and Account can also be suspended or blocked by TOP.ph and AUB due to the following circumstances:
- User’s non-compliance to policies or certain bank requirements;
- Risk reasons
- Involvement of the account with prohibited activities such as gambling cryptocurrency, trafficking, etc.
TOP Card Replacement, Renewal, and Expiry. The TOP Card validity is ten (10) years. Issued card expires on the last day of the card validity date printed on the physical card.
Account Holder may request card replacement in case of loss, misuse, and/or damage. Card re-issuance request will be processed as follows:
- Current card must first be permanently blocked;
- Issuance of the physical card must be done at TOCI’s channels.
The TOP Card is not automatically renewed. Account Holder will need to request for new card to replace expired one.
Undertaking. The Account Holder acknowledges that TOCI has the absolute discretion, for any reason, to:
- refuse to complete a TOP Card transaction;
- to refuse, reissue, renew, or replace your Card;
- to amend, modify, restrict, or terminate your use of the TOP.ph and this T&C; and/or
- Suspend or deactivate your use of TOP Card or TOP.ph.
TOCI has the right to withhold the release of the funds in TOP Card if they are subject to an investigation or Claim until the matter is resolved.
The Account Holder hereby agrees and undertakes to immediately return to TOCI any amounts due to TOCI without the need for any notice or demand, as well as any and all expenses, costs, and damages that TOCI may have incurred in connection with the enforcement of TOCI's right to recover and collect such amounts. This includes over-credit, erroneous credit, failure to debit, erroneous debit, misposting, or any error in transaction involving any amount to the Account as appearing in the records of TOCI, regardless of the cause.
To this end, the Account Holder hereby irrevocably authorizes TOCI to debit funds from the Account to the extent of the amounts owed to TOCI under this paragraph, without the necessity of any additional action or deed, and without TOCI incurring any liability as a result. This is without prejudice to TOCI's right to enforce the full recovery and collection of any amounts due to TOCI in the event that the Account cannot be debited for any reason, as well as the exercise of the legal remedies to which TOCI may be entitled under applicable laws, rules, and regulations and these Terms and Conditions. The Account Holder shall retain the aforementioned amount in trust for TOCI until the full recovery or collection of the aforementioned amounts by TOCI. Failure of the Account Holder to account for and return the amounts owed to TOCI will result in a prima facie presumption of misappropriation or conversion with intent to default on the part of the Account Holder.
Other terms and conditions. The Account Holder hereby agrees that TOCI shall have the right to revise, amend or supplement these Terms and Conditions, as well as the features and functionalities of the Account. Any such revision, amendment or supplement shall take effect and become binding on the Account Holder from such time that the same is published, announced or displayed by such means of publication or communication determined by TOCI.
The Account Holder hereby agrees that the Account is not a deposit account insured by the Philippine Deposit Insurance Corporation.
These Terms and Conditions shall be governed by and construed in accordance with the laws of the Republic of the Philippines, without regard to the conflict of laws principles thereof that require the application of laws of other jurisdictions. Any dispute relating hereto shall be brought exclusively before the proper courts of Makati City and Parañaque City.
